HORSE TRAINING
At Faith Training Center, all of our training techniques focus on making the desired result the most comfortable way for the horse. Faith Training Center specializes in starting horses for a good foundation that will prepare them for any discipline. We start colts, "bomb proof" trail horses, finish English and western horses for the show ring, train gaited horses, and much more. We encourage owners to take riding lessons and watch their horse's training to ensure success with their horse when they return home. Owners receive frequent email updates on their horse's progress or watch their horse's training. If you need colt starting or that finishing touch for the show ring, give us a call. We would love to help you accomplish your dreams!
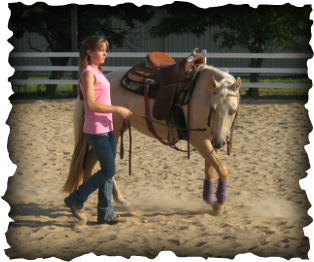
Faith Training Center’s experienced trainers use gentle methods. We thoroughly prepare each horse for the next step of training, so that he can quietly accept and understand it when it is presented to him.
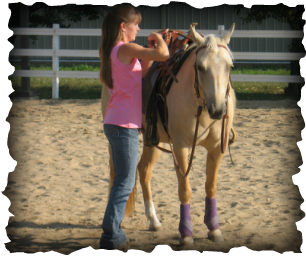
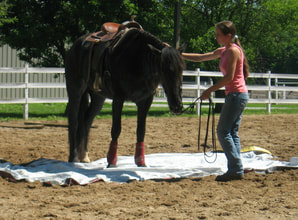
Colts are started with lots of ground work. They learn to lead quietly, stand patiently, stop with the word, "Whoa," back willingly, lunge, carry a saddle and bridle, softly give to the bit, and drive on long lines before they are mounted for the first time.
Because horses do not understand English, it is our job to help the horse understand what we want from him. Through consistent, patient training, we explain what we want to the horse in a way he can understand. This creates a quiet, trusting mount, that desires to please his rider.
Well trained horses are not an accident; They are a product of many intentional hours of patient, consistent training. If you have a goal with your horse, whether it be showing or trail riding, we would be honored to help you with all of your training needs.
Following up on a Leap - trained at FTC:
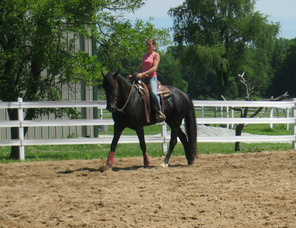
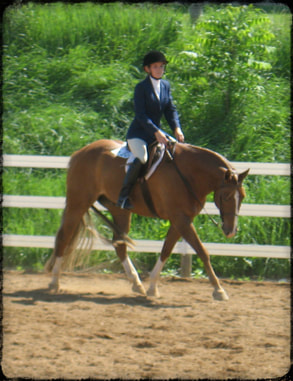
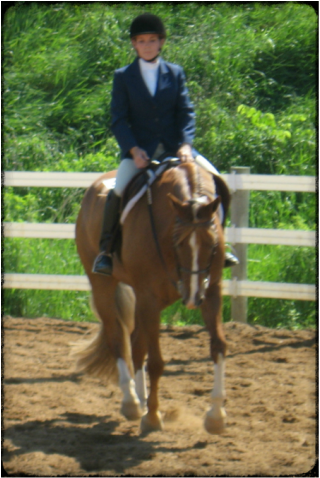
Madison and Leap are doing well! As you can see; Madison is not lacking in confidence! Leap was in training for English and western pleasure, horsemanship, equitation, and showmanship. Madison had a great first year showing Leap at her local 4-H Fair in Johnson County, Indiana. Madison got 1st place in both her English and western pleasure classes! Good job, Madison!
Madison and Leap are doing well! As you can see; Madison is not lacking in confidence! Leap was in training for English and western pleasure, horsemanship, equitation, and showmanship. Madison had a great first year showing Leap at her local 4-H Fair in Johnson County, Indiana. Madison got 1st place in both her English and western pleasure classes! Good job, Madison!
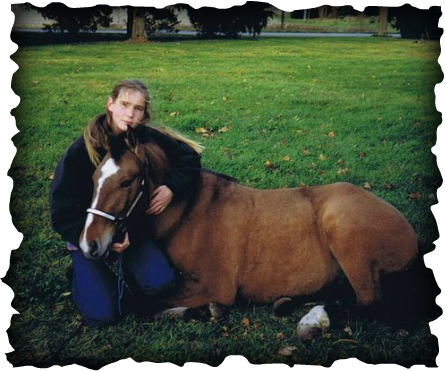
This is I, Hannah Barden, as a 16 year old girl with my pony, Hurricane. I purchased her when she was 10 months old. Hurricane knew nothing except how to eat! I spent hours and hours with my pony. She became so quiet that I could do almost anything with her.
I decided I wanted her to learn to lie down. I had trained my dog to lie down, so why couldn't my pony learn to lie down? I had never had instruction on how to train a horse to lie down. I had only practiced with dogs; but that didn't stop me!
After several weeks, I could get Hurricane to lie down in a matter of seconds. I had no idea at the time what an accomplishment this was.
It was soon after this that I decided to sell both of my first horses (ponies) since I had grown a little to tall for them. It was a very hard decision, but soon I had a prospective buyer looking at Hurricane.
The potential buyer REALLY liked what I had done with Hurricane. After all, Hurricane knew how to ride, drive, lead without a halter or lead rope, showmanship, pick up her hooves, stand still, load into a trailer, tie, lunge, and... lie down!
The prospective buyer only took a minute or two to look at Hurricane. She told me she did not want to purchase her. I was really surprised! I thought Hurricane would be perfect for her little girl. She told me that instead of purchasing Hurricane from me, she wanted to send her spoiled, untrained pony to me so I could teach him some of the things that I had taught Hurricane.
She was going to sell her pony because he was so unsafe but changed her mind when I agreed to work with him. That was the first horse I trained for a customer. I did not know any "proper" ways to train horses. All I knew was that the more I handled a horse, the better it got.
Since then things have changed; Now I know some of the easier ways to train horses. One thing has not changed. I still think they are the most wonderful creatures God made, and I love working with them. ~Hannah Barden
The Concept of Horse Training
How can you train a 1000 pound horse to do your will? Looking at the big picture, it is simply amazing what a horse can be trained to do.
Almost everyone has heard the saying, “You can lead a horse to water, but you can’t make it drink.” A horse trainer's job is to make the horse thirsty, so that when he gets to the water he WANTS to drink.
Here is an example of training: Eat a piece of chocolate. Mmmm, that tasted good. It felt good in your mouth, it felt good going down to your tummy, and the taste it left in your mouth… yummy! The next time you see chocolate you will think, “I can’t wait to eat that!” Now, eat a piece of moldy cheese. You cannot spit it out! Ha-ha! That is part of the experiment. It feels
yucky on your tongue, it smells bad as you chew it, if you can swallow it without vomiting it up, it tastes bad and smells bad all the way down your throat.
Even after it is down, it still tastes bad. After you have tasted both, when I hold out chocolate in one hand and moldy cheese in the other hand, I know which one you will choose. Why? Because, you are just like a horse in the sense that you want what is good for yourself. You like being comfortable, and even better than being comfortable, you like rewards.
The concept of horse training is just as simple. When the horse responds correctly to what you are asking him to do, reward him. When the horse responds incorrectly to what you are asking him to do, continue making him uncomfortable until he finds the correct answer. This concept is very simple; however, applying this to different circumstances effectively requires lots of patience and perseverance.
The cornerstone of horse training uses the horse’s desires to motivate him to do what we want. Horses are naturally selfish; they look out for their own comfort. When I make my horse comfortable for doing my will, and uncomfortable for going against my will, I am making him want to please me.
I like to compare horse training to the game Hot and Cold. By making my horse more comfortable as he gets closer to what I am asking him to do, and making him less comfortable as he gets farther away from what I am asking him to do, I start a silent dialogue with him. This would be the same as giving you a little chocolate for walking one direction, and a little moldy cheese for walking the opposite direction. Without saying a word, I could encourage you to walk the direction that you got chocolate.
Let me give you an example. I am going to teach a horse to lead (also the same thing as giving to the pressure applied to the crown piece of his halter.) I apply pressure to my lead rope (which is attached to the bottom of his halter.) This is my cold signal. The pressure I am applying makes the horse uncomfortable. As long as I am pulling, I am telling him, “Cold.” If he pulls back against the pressure, I continue telling him, “Cold,” by consistently pulling. No matter what he does, I will keep telling him, "Cold," (by pulling) until he gets a little closer to what I want him to do -which is step forward. If he leans forward, I will give him a slight release (soften the pull) to tell him, “You’re getting warmer." If he pulls back again, I will re-apply the pressure telling him, “Cold,” again. The instant my horse steps forward I will let him completely go, telling him, “Hot,” or, "You got it!" Using this method of training is very effective if done correctly; however, done even slightly incorrectly it can take much longer to see positive results. Let me explain why.
Example: If I want to get you to walk one direction, I must only give you chocolate for walking my direction and moldy cheese for walking your direction. If I accidentally give you chocolate even once for walking your direction, it will confuse you. You will not have a clear understanding of what you need to do to get the chocolate. If I give you moldy cheese even one time for walking my direction, that will confuse you even more.
Timing is crucial in horse training. If you are off even a few seconds in rewarding your horse for responding correctly, he can be left clueless as to why he was rewarded. As simple as horse training is, it requires lots of consistent repetition to leave a lasting effect on the horse’s behavior. Why?
Example: When you first started learning to walk, you first had to learn to stand without holding onto anything. Next you had to figure out how to balance as you took a little step. You fell many times as you progressively walked longer distances. Each time you practiced, you improved your walking skills. It took you days, weeks, and months of continual practice to learn to walk well.
At first, walking was awkward and daunting, but the more you did it, the easier it got. Your horse has to practice in much the same way as you did, learning to respond correctly to one cue at a time. Time after time of responding correctly forms a habit of responding correctly. Instead of having to think about what you are asking him to do and it feeling awkward, it will become second nature for him. Then he will immediately do it. Last but not least: If someone expected you to learn to walk well in a month or two, it would discourage you from even wanting to try. You would not have the time you needed to build the balance and strength, let alone coordination that walking requires. Horse training takes a tremendous amount of time.
You must build off many small improvements, which over time, make big improvements. Remember to reward your horse for every small improvement he makes, and give him adequate time to practice each small step before taking another. ~Hannah
A Little Bit of Information
After explaining the mechanics of bits to horseman after horseman and seeing their amazement as they understand for the first time, I have finally decided to put my little bit of knowledge into written format. Hopefully this will be a blessing to horses and owners alike and aid in better communication between horse and rider. ~Hannah Barden
There are three things we need to consider when choosing a bit. First, the horse’s mouth, second, the rider’s ability, and third, the horse’s training.
When we place a bit in a horse’s mouth, we can affect his lips, tongue, bars (basically the horse’s gums,) palate (the roof of the horse’s mouth), and teeth. If a bit is placed too high or too low in the mouth, it can bang against the teeth. Wolf teeth can also interfere with the bit. It is best to have a veterinarian do a thorough exam of your horse’s mouth to ensure no problems exist before bitting your horse for the first time. Also, check for damage to the mouth. If there is an area of your horse’s mouth that has been damaged, avoid using a bit that will put pressure on that area.
There is no bit that can damage a horse’s mouth. There are only inexperienced hands that pull on a bit incorrectly that damage a horse’s mouth. If we honestly appraise our ability as a rider, we can choose a bit that is better suited for our ability and avoid damaging our horse’s
mouth.
When I am giving riding lessons, I often compare riding your horse with driving a car. When you steer your car, you don’t whip you hands right and left, stomp on the brakes, then jam on the gas! You smoothly steer your car around. You speed up and stop smoothly. It is only fair, when you place a piece of metal in your horse’s mouth, that you give him ample warning that you are going to ask him to do something. I call this, “Giving your horse think time”. When I ask my horse to turn right, I move my hands in “slow motion.” When I stop, I say, “Whoa.” I will only pull if he chooses not to stop.
If you have quick, hard hands, you need to ride in a bit that has a slow signal and very little leverage. If you have soft hands, and you are good at giving your horse “think time,” you may be better suited to a bit that has a quicker signal and more leverage.
We also need to consider our horse’s level of training. If your horse doesn’t know how to give to the bit, he is going to pull on any bit that is placed in his mouth and could eventually cause damage.
For a horse to understand what we are asking him to do when we apply pressure to a bit in his mouth, he needs to be trained how to give to the bit. If he hasn’t been trained, it is unrealistic to expect him to relax and obey what we are asking him to do. It is extremely important that we do not overlook this basic training.
I am going to focus on two types of bits; direct contact bits and leverage bits.
A snaffle bit is what I would consider a direct contact bit. A snaffle bit is the simples bit for a horse to understand for basic training. When 1 lb. of pressure is applied to the rein, the horse feels 1 lb. of pressure on his mouth. When you pull on one rein with a snaffle bit, the horse feels a simple pull that is not distorted by leverage. In the beginning stages of training, when I am teaching my horses to give to the bit, this is what I choose.
The snaffle works by pinching and restricting the horses tongue and pulling on the lips. Have you ever pinched your tongue and then tried to walk around? Silly me, I actually tried it! It was very educational and helped me understand why my horse responds when I apply pressure to his tongue.
As more pressure is applied to the snaffle with a straight back pull, you can also
achieve bar pressure. If you are pulling too hard, you achieve palate pressure. If your snaffle has a sleeve over the joint of the mouthpiece, it will keep your bit from collapsing to the point that you achieve palate pressure.
When I am selecting my snaffle bits, I always check to make sure that the mouthpiece was made correctly. If you hang a snaffle by the center joint of the mouthpiece, both butts of the bit should meet evenly. If this is not the case, you will have more control over the side of the snaffle that is longer. I also check my bits for pinch points, rough spots, and sharp edges that may damage my horse’s mouth.
The cheekpiece of a snaffle determines how spread out the pressure is across the side of the horse's face when you pull. A full cheek snaffle has a very broad area of pull, versus a loose ring snaffle, which has a very small area of pressure when you pull. As a rule, the more pressure is spread out, the less severe the affect of the pull.
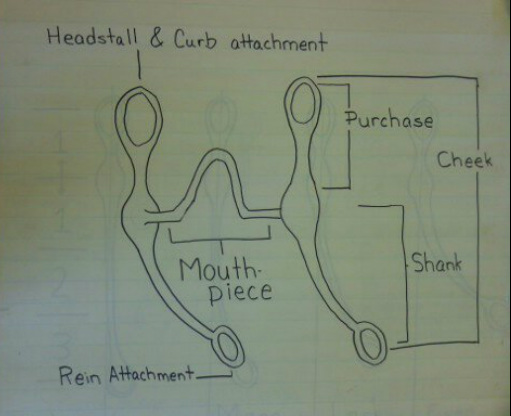
Leverage bits are bits that have shanks and utilize curb strap pressure to achieve leverage. Leverage bits present more complex signals than direct contact bits. Depending on the type of bit, the horse may feel 3 lbs. of pressure in his mouth when you are only applying 1 lb. to the rein. This is because of the leverage action of the bit. When you pull on the reins, depending on what mouthpiece you have, you can achieve lip, tongue, bar, palate, poll, and curb pressure.
If your mouthpiece has a straight mouth, you will have lots of tongue pressure. If it has a port, depending on the width and height of that port, you will have minimal or maximum tongue relief (an area for the tongue to slip into to avoid pressure), and bar pressure. If your bit has a port that is 2 ½” high or more, you will then have palate pressure. The palate is very sensitive, so save this for experienced hands and well trained horses.
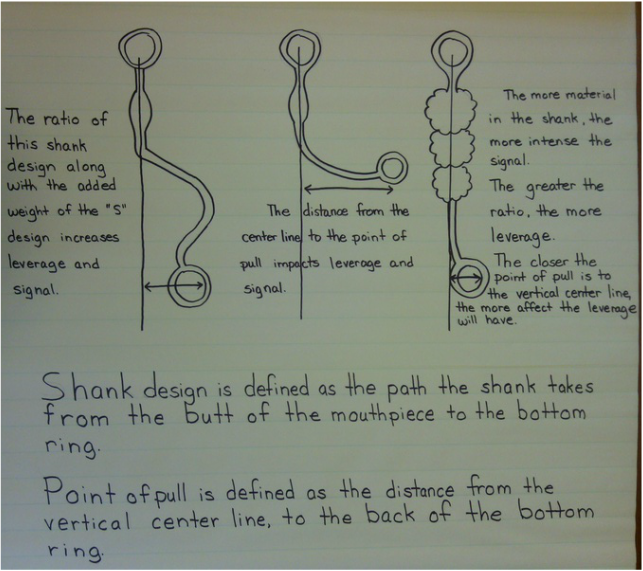
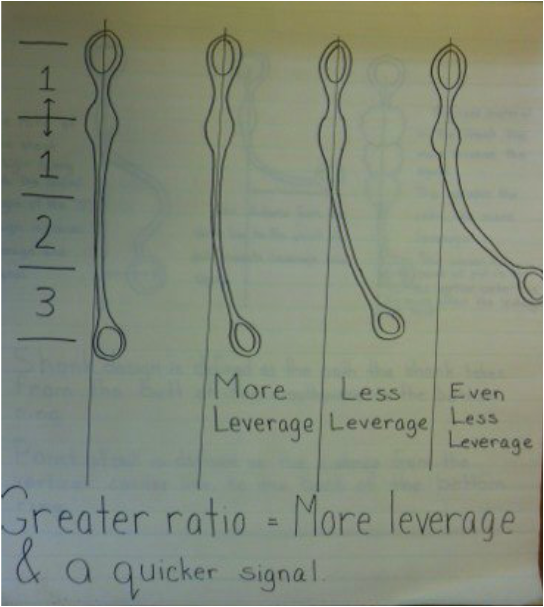
The design and placement of the shanks on a leverage bit have a huge impact on the severity of the bit. The shank design is the path from the butt of the mouthpiece to the bottom ring. The point of pull is the distance from the vertical center line to the back of the bottom ring.
Different bit designs give faster or slower signals to the horse. When explaining what signal is, I like to use the comparison of a traffic light giving you warning to prepare to stop. If the light instantly went from green to red, that would be a very quick signal. From green to yellow to red is a quick signal. Now imagine having an extra traffic light that was white and the lights went from green, to white, to yellow, to red. That would be a slow signal. You would have plenty of time to prepare to stop.
Fixed shanks (this means they do not move, they are firmly attached to the mouthpiece) enable a novice rider who can’t “feel” whether the reins are even to maintain even contact with the horses face. The fixed shank applies the same pressure to both sides of the mouth because of the fixed nature of the bit. Once you “loosen” the shanks, which means you can move each shank individually, they are not firmly attached to the mouthpiece, you gain the ability to work both sides of the horse independently. This is a great advantage if the horse is green.
The balance of the bit is also a factor when considering the severity of a bit. Hold the mouthpiece of the bit on the tip of your fingers; If the shank swings forward of a vertical line, it is overbalanced. If the shank hangs straight on a vertical line, it is balanced. If the shank hangs behind a vertical line, it is underbalanced. I choose an overbalance bit for training because of the quick release achieved when the rein pressure is released.
A balanced bit it ideal for a western pleasure horse because the pressure on the curb strap is only released when the horse’s face is vertical (at the sweet spot). An underbalanced bit is not desirable, because the curb strap doesn’t release and the signal is so quick.
When choosing where to place the bit in the horse’s mouth, I look at my horse’s level of training first. Green horses that are not accustomed to a bit in their mouth are likely to chew and move their tongues a lot. They will most likely get their tongue over the bit, which causes a release of endorphins. This can be addictive. Since you have very little to no control over the horse when their tongue is over the bit, this is a very bad habit for a horse to learn. Because of this, in the first stages of a horse learning to carry a bit, I will place the bit high up in the horse’s mouth to allow him to learn to keep his tongue under the bit. Once the horse can carry the bit without putting his tongue over it, then I will lower the bit in his mouth.
Ideally my bit will be barely touching the corners of my horse’s lips. This will allow for maximum feel when I lift a rein. If I have 1 or 2 wrinkles on my horses lips, there is already pressure applied to the bit. This will keep my horse from feeling very soft cues from my fingers.
Here is a list of some things which will make the affect of a bit severe.
Heavy, quick hands
A horse that resists the bit
Small diameter of mouthpiece
Twisted mouthpiece
Less tongue relief
Narrow curb strap
Tight curb strap
Straight shank
Long shank (or the greater the ratio of the shanks and purchase)
Joints on port (digs into the sides of the tongue)
High port (causing palate pressure)
Here is a list of some features of the bit that make the signal of the bit faster or more intense.
Tight curb strap
Heavy shank
Light reins
Underbalanced bit
